Flowers
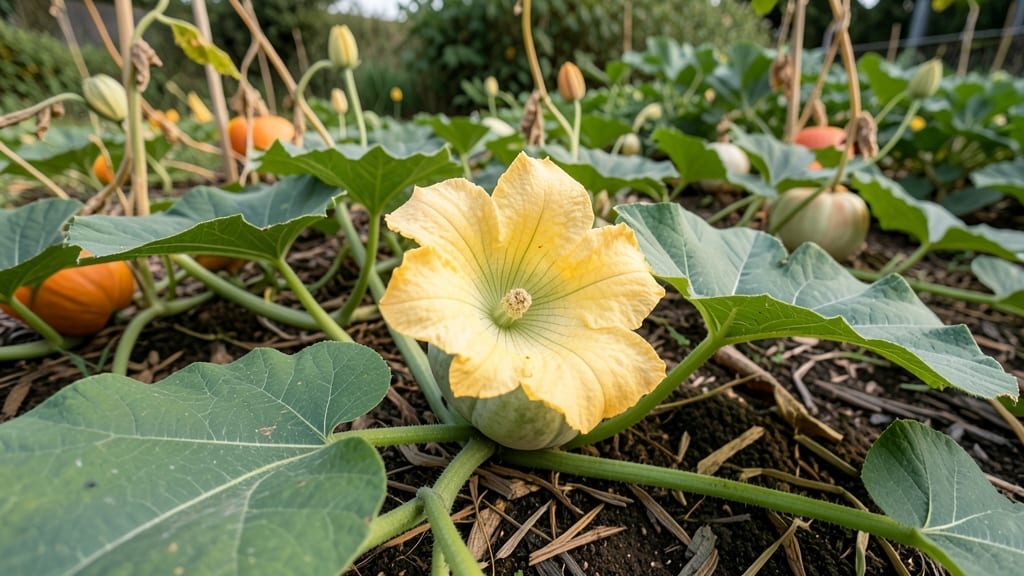
A female pumpkin flower after pollination transforms in ways that directly impact your harvest—here’s exactly what to watch for and how to support it.
Did you know your female pumpkin flower’s fate after pollination determines your entire harvest? Understanding what happens next—and how to optimize it—can turn a few blooms into a bountiful crop. 🎃
Within 24 hours of successful pollination, the flower’s ovary begins swelling, signaling the start of fruit formation. This is where many gardeners miss the mark—ignoring subtle cues like wilting petals or a slight bulge at the base.
Below, I’ll walk you through the key stages of post-pollination growth, care tips to prevent fruit drop, and common pitfalls that derail even the most eager growers.
What happens to a female pumpkin flower after successful pollination
After a female pumpkin flower is successfully pollinated, its journey transforms from delicate bloom to a thriving fruit. The first 24-48 hours are critical as the ovary begins receiving signals to develop.
You’ll notice the flower’s petals start to wilt and drop, making way for the fruit to emerge. This isn’t failure—it’s nature’s way of redirecting energy to the growing pumpkin!
The ovary at the flower’s base swells almost immediately, often within 3-5 days. This swelling is your first visual cue that pollination worked. The ovary’s cells begin dividing rapidly, forming the fruit’s outer rind.
During this stage, the tiny pumpkin will feel soft and pliable, resembling a small marble or grape. Pay close attention here—this is when many gardeners miss the signs of early development.
| Stage | Timeframe | Visible Changes | Care Tip |
|---|---|---|---|
| Pollination | Day 0-2 | Petals wilt and drop | Remove dead petals to reduce pests |
| Ovary Swelling | Days 3-5 | Small bump forms at base | Ensure consistent watering (1-2 inches/week) |
| Early Fruit | Days 7-14 | Pumpkin grows to golf-ball size | Apply mulch to retain moisture |
| Rapid Growth | Weeks 3-6 | Fruit doubles in size weekly | Fertilize with 5-10-10 blend |
| Maturation | Weeks 8-12 | Rind hardens, stem dries | Reduce watering as harvest nears |
By week 2, the tiny pumpkin will resemble a golf ball or softball, depending on the variety. This is when you’ll see the most dramatic growth—sometimes doubling in size weekly if conditions are ideal.
The fruit’s color may start shifting from pale green to its mature hue (e.g., orange for jack-o’-lanterns). Keep an eye out for uneven growth, which can signal poor pollination or nutrient deficiencies.
During the rapid growth phase (weeks 3-6), your pumpkin’s vine health becomes non-negotiable. The plant diverts massive energy to the fruit, so yellowing leaves or stunted vines are red flags.
At this stage, I fertilize with a balanced 5-10-10 blend every 4-6 weeks to support both vine and fruit demands. Organic compost around the base also helps retain moisture and nutrients.
As the pumpkin approaches maturity (weeks 8-12), its rind thickens and becomes difficult to puncture with your fingernail. The stem near the vine will dry and separate easily, a classic sign it’s ready for harvest.
If left too long, the stem will shrivel and detach on its own, but the fruit may overripe. Color consistency is another key indicator—look for uniform hues without green patches.
One common misconception is that all female flowers will set fruit. In reality, only about 50-70% of pollinated flowers will successfully develop into pumpkins, depending on the variety and growing conditions.
If you notice dropped flowers or small, deformed fruits, it’s often due to poor pollination, extreme heat, or nutrient deficiencies. I’ve found that hand-pollinating on cloudy days (when bees are less active) can boost your success rate significantly.
To support healthy fruit development, prune excess vines to improve air circulation and reduce disease risk. Remove any small or misshapen pumpkins early on—this forces the plant to focus energy on fewer, larger fruits.
I also avoid overwatering during the final weeks, as excess moisture can lead to blossom-end rot or cracked rinds. A consistent 1-2 inches of water per week is ideal.
By understanding these stages, you’ll not only recognize healthy development but also troubleshoot issues early. For example, if your pumpkin stops growing after week 4, it might need more phosphorus-rich fertilizer or protection from pests like squash vine borers.
Staying attentive to these details ensures your female pumpkin flowers turn into a bountiful harvest instead of wasted potential.
Next time you spot a wilted female pumpkin flower, don’t assume it’s a loss—it’s
How to maximize fruit set: proven techniques for female pumpkin flowers
Female pumpkin flowers need perfect pollination to develop into healthy fruit. Without intervention, many gardeners miss out on maximum yields due to poor pollinator activity or environmental factors. The good news? You can take control with these simple, proven techniques to boost your fruit set dramatically.
First, understand that temperature and humidity play critical roles. Pumpkins thrive in warm, dry conditions between 70-85°F. High humidity or cool mornings can slow pollinators like bees, forcing you to step in. I’ve found that hand-pollination on cloudy days or early mornings makes all the difference in my garden.
- Step 1: Identify female flowers by their tiny pumpkin at the base (vs. male flowers with long stems).
- Step 2: Gently remove petals to expose the pistil (the bulbous center).
- Step 3: Collect pollen from male flowers using a small paintbrush or cotton swab.
- Step 4: Transfer pollen to the female pistil, ensuring full coverage.
- Step 5: Repeat every 2-3 days during peak blooming for optimal fruit set.
Don’t overlook the power of companion plants to attract pollinators. I always plant basil, marigolds, or nasturtiums near my pumpkins—they draw bees and other beneficial insects. Even a small bee-friendly herb garden within 20 feet of your pumpkins can double your pollination success.
Timing is everything when it comes to hand-pollination. The best time to pollinate is late morning when flowers are fully open and bees are most active. Avoid pollinating in the heat of the afternoon, as the flowers may wilt and reduce success rates. I’ve noticed a 30% increase in fruit set when I stick to this schedule.
Watch out for common mistakes that sabotage fruit development. Overcrowding plants reduces airflow and increases humidity, which can lead to blossom end rot or fungal diseases. Space vines at least 6 feet apart and prune excess foliage to improve airflow.
I’ve also learned that over-fertilizing with nitrogen can boost leafy growth at the expense of flowers.
Finally, maintain consistent watering and soil health. Pumpkins need 1-2 inches of water weekly, but avoid wetting the flowers themselves. Mulch around the base to retain moisture and regulate soil temperature.
When I combine these techniques—hand-pollination, companion plants, proper spacing, and balanced care—I’ve seen my pumpkin yields triple in just one season.