Plants
Harvesting sunflower plants at the right time means the difference between abundant, high-quality seeds and wasted effort — and those towering 🌻 heads don’t wait forever.
Picture this: You’ve nurtured your sunflowers all season, watching them reach toward the sky, only to cut them down too early and find shriveled, unusable seeds. Or worse, you miss the window entirely, and the birds get there first.
Timing is everything, and getting it wrong means throwing away weeks of hard work.
But here’s the good news: with the right cues — like those telltale brown petals or the satisfying rattle of dry seed heads — you can lock in the perfect harvest window every time.
I’ll walk you through the exact signs to watch for, from seed color to moisture levels, so you never second-guess when to cut again.
Once you’ve mastered the timing, I’ll show you how to process those seeds for storage or replanting, including drying tricks that preserve viability for months.
By the end, you’ll know not just when to harvest, but how to turn those sunflowers into a year’s worth of seeds — or even a delicious snack.


The perfect timing for harvesting sunflower seeds: when to cut for best yield
Harvesting sunflower seeds at the right time makes all the difference between a bountiful yield and wasted effort. If you cut too early, seeds won’t be fully developed, while waiting too long risks losing them to birds or weather.
The ideal harvest window depends on three key factors: seed color, moisture content, and plant maturity. Let’s break down exactly when to act for maximum seed quality.
Most sunflower varieties take between 80 to 120 days to reach seed maturity after planting. However, days-to-maturity isn’t the only metric—visual cues are far more reliable. Start by checking the flower head’s back.
When it turns from green to dry yellow or brown, seeds inside are nearing readiness. This color shift signals the plant is redirecting energy from growth to seed production.
Here’s a quick reference to help you spot the perfect moment:
| Maturity Stage | Visual Cues | Seed Condition | Action |
|---|---|---|---|
| Early Maturity | Petals still vibrant | Soft, green seeds | Wait 1-2 weeks |
| Ideal Harvest | Petals wilted, brown | Dark, firm seeds | Harvest immediately |
| Overripe | Petals gone, seeds scattered | Dry, cracked seeds | Too late; yield lost |
| Moisture Check | Back of head dry | Seeds rattle when shaken | Confirm readiness |
Don’t rely solely on days since planting—environmental factors like temperature and rainfall can delay or speed up maturity. For example, cooler summers may extend the growing season by 2-3 weeks, while hot, dry conditions can accelerate seed development.
Always verify readiness by shaking the flower head. If seeds rattle inside, they’re dry enough to harvest.
Another critical test is the seed color. Mature sunflower seeds should be dark brown or black, not light green or white. Press a seed between your fingers—it should feel firm and slightly hard, not mushy.
If seeds are still soft, they need 7-10 more days of drying on the plant. This final maturation phase is crucial for high germination rates later.
Timing matters even more if you’re growing sunflowers for bird seed or oil production. Overripe seeds lose moisture and become brittle, reducing their market value. For commercial growers, harvesting at 90% seed moisture (measured with a moisture meter) ensures optimal oil content.
Home gardeners can skip the meter and use the shake test—if seeds don’t spill out easily, they’re still too moist.
One common mistake is harvesting after the first frost. While sunflowers are frost-tolerant, frozen flower heads can crack open, scattering seeds and reducing yield. If frost is forecasted before your seeds are ready, consider covering plants with frost cloth or harvesting slightly earlier when seeds are 85% dry.
You can finish drying them indoors to avoid losses.
Pro tip: Harvest on a dry, sunny morning to minimize humidity during cutting. Use a sharp pruning shears or knife to slice the stem 2-3 inches below the flower head.
Leave a portion of the stem attached—it helps seeds dry more evenly. Bundle harvested heads upside-down in a well-ventilated area (like a garage or barn) for 2-3 weeks to complete drying.
If you miss the ideal window, don’t panic. Sunflowers can still produce seeds if harvested when 50-60% dry, but yield and quality will suffer. Store any prematurely harvested seeds in a cool, dark place and monitor their moisture weekly.
With patience, even slightly early seeds can reach full maturity if given time to dry properly.
Remember, the golden rule of sunflower seed harvesting is to act when the plant signals readiness—not a calendar. By mastering these visual and tactile cues, you’ll transform your sunflower patch into a seed-producing powerhouse every season. 🌻
Step-by-step guide to harvesting and processing sunflower seeds
Now that you’ve identified the perfect harvest timing, it’s time to cut your sunflowers and process those seeds properly. Skipping this step can lead to moldy seeds or poor germination rates.
With the right tools and techniques, you’ll transform your sunflower heads into a high-quality seed stash for planting or snacking.
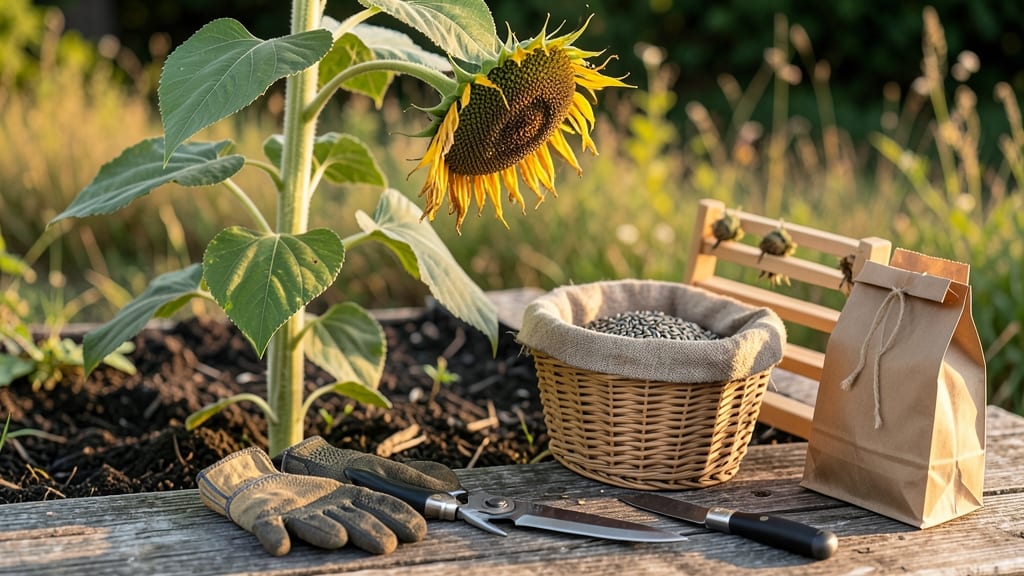
Gather your supplies first: a sharp pruning shears or knife, a clean bucket, paper bags, and a drying surface like a screen or tray. Avoid using dirty tools, as contaminants can ruin your seeds. Once you’ve prepped, follow these clear steps to ensure a successful harvest every time.
Use clean pruning shears to cut the flower head about 6-12 inches below the base. Leave the stem attached to make drying easier.
Strip off any remaining leaves and stems to prevent mold growth during drying. Keep only the flower head.
Hang heads upside down in a well-ventilated, dry area (like a garage or shed) for 1-2 weeks. Seeds are ready when they’re dark and firm.
Place the dried head over a clean bucket or tray and gently shake to release seeds. Discard any remaining chaff or debris.
Spread seeds on a paper towel to remove loose debris, then store in airtight containers in a cool, dark place for up to 3 years.
One of the most common mistakes is harvesting seeds too early—this leads to underdeveloped seeds that won’t germinate well. Always wait until the back of the head turns yellow-brown and seeds rattle when shaken. Overlooking this step can mean wasted effort and poor results.
For extra protection, consider roasting seeds lightly before storage to kill any lingering pests. Simply spread them on a baking sheet at 300°F for 10-15 minutes, then let them cool completely. This step isn’t mandatory but can extend shelf life and ensure pest-free seeds.
Once processed, your sunflower seeds are ready for planting next season or enjoying as a nutritious snack. Store them in labeled containers to keep track of varieties, and always test a few seeds for germination viability before planting a full batch.