How To
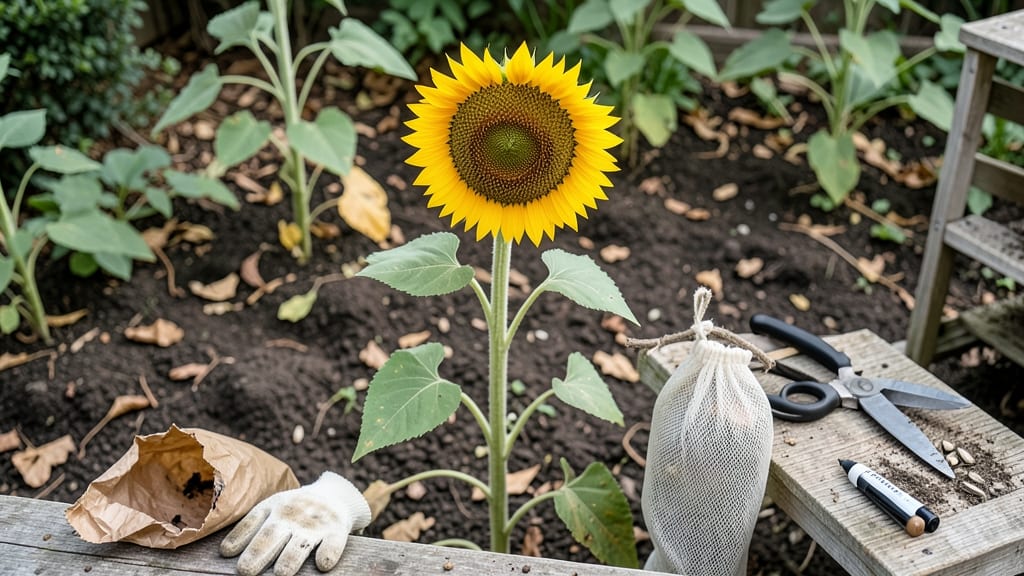
Picking sunflower seeds at the right time means the difference between rich, nutty flavor and bitter disappointment — and the key is watching for three clear maturity stages before the birds or frost get there first.
Imagine this: you’ve nurtured your 🌻 sunflowers all summer, and now the petals have fallen away, leaving behind a dry, papery head. But is it really ready? Too early, and the seeds won’t be fully developed; too late, and they’ll shatter or mold.
I’ll show you exactly how to tell when those seeds are perfect for roasting, bird feeders, or oil extraction — plus how to dry and store them for maximum shelf life.
Timing depends on your USDA Zone 6a climate, seed variety, and even the color of the seed head’s back. Some sunflowers mature in as little as 80 days, while others take twice that long.
We’ll break down the visual cues — from green to brown to fully ripe — so you never miss the window between peak harvest and total loss.
By the end, you’ll know not just when to pick, but how to handle them afterward: whether to leave them on the stalk for drying, shake them into a bag, or salvage overripe seeds for compost. Ready to turn your sunflower patch into a year-round resource?


How to identify sunflower seed maturity by color & plant stage
Sunflowers go through three distinct maturity phases before their seeds are ready to harvest. Missing these visual cues means you could end up with bitter seeds or lose them to birds and squirrels.
The key is watching the seed head color, back color, and overall plant signals. Let’s break down each stage so you never harvest too early or too late.
First, focus on the seed head color. When sunflowers first bloom, the seed head appears green and closed. This is Stage 1: Immature, where seeds are still developing. The petals will eventually open fully and turn golden yellow, signaling the start of seed formation.
At this point, the back of the head remains green—this is your first clue that seeds aren’t ready yet.
Next comes Stage 2: Developing, where the seed head starts turning brown at the edges while the center remains green. This phase is tricky because seeds are partially mature but not fully developed.
The back of the head will also begin to yellow slightly, and the petals may start to wilt and drop. If you harvest now, seeds will be underdeveloped and bitter, so patience is key.
Here’s where it gets exciting: Stage 3: Fully Ripe. At this stage, the entire seed head turns uniform brown, the back becomes dry and papery, and the petals have completely fallen off.
Shake the head gently—if seeds rattle loudly inside, they’re ready. This is the perfect harvest window for both edible seeds and bird feed.
| Maturity Stage | Seed Head Color | Back of Head | Petals | When to Pick |
|---|---|---|---|---|
| Immature | Green, closed | Green | Attached | Not ready |
| Developing | Brown edges, green center | Yellowing | Wilted/dropping | Wait 1-2 weeks |
| Fully Ripe | Uniform brown | Dry, papery | Fallen off | Harvest now! |
Climate plays a huge role in harvest timing. In hot, dry regions, sunflowers mature faster—sometimes in as little as 80 days. But in cooler climates or areas with early frosts, seeds may take up to 120 days to reach full maturity.
If frost is forecasted before your sunflowers ripen, harvest early and dry the seeds indoors to preserve them.
One of my favorite tricks is to cover the seed head with a breathable mesh bag once it reaches the developing stage. This keeps birds and squirrels from stealing your harvest while still allowing the seeds to mature.
Remove the bag only when the head is fully brown and dry. This method has saved dozens of seed heads in my garden over the years!
Pro tip: Cut the entire stem about 6-12 inches below the seed head and hang it upside down in a dry, dark place (like a garage or shed). This allows seeds to fully dry and loosen from the head over 1-2 weeks.
Once dry, gently rub the head between your hands or use a fork to remove the seeds—no need for complicated tools!
If you’re growing sunflowers for edible seeds, aim to harvest when the seeds are plump and firm but still soft enough to crush between your fingers. For bird feed, wait until seeds are completely hard and dry.
Overripe seeds can sprout or attract pests, so don’t wait too long after the head turns brown.
Finally, store your harvested seeds in a cool, dark place in an airtight container for up to 6 months if kept dry. For long-term storage, consider freezing seeds to preserve freshness and prevent mold. With these cues, you’ll never miss the perfect harvest window again!
Best harvest methods for sunflower seeds by seed type (edible vs. bird feed)
Harvesting sunflower seeds at the right time depends entirely on your end goal. For edible seeds—whether for snacking, oil extraction, or baking—you’ll want them at their peak softness and moisture, while bird feed seeds need to be fully hardened and dry.
The difference between these two stages is subtle but critical, and missing it can mean the difference between delicious, oil-rich seeds and bitter, mold-prone ones.
Timing is especially tricky because sunflowers mature unevenly, even within the same plant. Some seeds on a single head may be ready for harvest while others remain underdeveloped.
This is why I always check for three key indicators before harvesting: the back color of the seed head, the seed color, and the sound when shaken. Each of these signals a different stage of maturity, and I’ll break down how to use them below.
For Edible Seeds (Soft, Oil-Rich)
- ✅ Back color: Light yellow-green
- ✅ Seed color: Creamy white to pale yellow
- ✅ Sound: Soft rattle (seeds not fully hardened)
- ✅ Moisture: 8-12% (seeds bend slightly)
- ✅ Petals: Mostly fallen, but some may linger
For Bird Feed Seeds (Hard, Dry)
- ✅ Back color: Deep golden-brown
- ✅ Seed color: Dark gray-black
- ✅ Sound: Loud, crisp rattle (seeds fully hardened)
- ✅ Moisture: 5% or less (seeds snap when bent)
- ✅ Petals: Completely fallen
If you’re harvesting for human consumption, aim to pick seeds when the back of the head is light yellow-green and the seeds inside are creamy white. At this stage, the seeds are rich in oil and have a soft, buttery texture perfect for roasting or pressing.
I like to harvest these slightly early—just as the petals begin to fall—and then dry them indoors for 2-3 days to reduce moisture to around 10%. This prevents mold while preserving their nutritional value.
For bird feed, wait until the back of the seed head turns deep golden-brown and the seeds inside are dark gray-black. These seeds are fully hardened and will last much longer in storage.
The key here is to act fast once the head turns brown, as birds and squirrels will strip it clean in a matter of hours. I recommend harvesting in the early morning when birds are less active, and then drying the seeds completely before storing them in airtight containers.
Storage is where many gardeners go wrong. Edible seeds should be stored in the fridge or freezer in an airtight container to slow oxidation and preserve their oil content. I use glass jars with silica packets to keep them fresh for up to 6 months.
For bird feed seeds, store them in a cool, dry place like a pantry, but check them monthly for pests. If you notice any signs of mold or webbing, discard the seeds immediately—even a few spoiled seeds can contaminate the whole batch.
One mistake I’ve made in the past is waiting too long to harvest for edible seeds, thinking they’d get "better" over time. Instead, they become bitter and rancid as the oil breaks down.
For bird feed, the opposite is true—waiting too long means the seeds may sprout or attract pests before you can use them. Always prioritize visual cues over guesswork, and when in doubt, harvest a few heads early to test their readiness.